


Price: $7.99
(as of Apr 08, 2025 04:11:19 UTC - Details)
The Best Way to Apply Press On Nails: A Comprehensive Guide
Introduction
Are you tired of spending hours at the nail salon, only to leave with nails that chip within days? If so, you’re in the right place! Press on nails are a fantastic alternative that offers salon-quality results from the comfort of your home. In this article, we’ll explore the best way to apply press on nails, ensuring you achieve a flawless look that lasts. We will cover everything from preparation to application techniques, all while highlighting essential tips and tricks to make your experience enjoyable and easy.
Why Choose Press On Nails?
Press on nails are not just a trend; they’re a game-changer for those who love beautiful nails but want the convenience of a quick application. They come in various styles, colors, and shapes, allowing you to express your personality effortlessly. Plus, the best part—applying them is simple! Let’s dive into the best practices for achieving a perfect press on nail application.
Understanding the Different Types of Press On Nails
1. Variety of Styles and Shapes
When it comes to press on nails, there's no shortage of choices. From classic almond shapes to trendy stiletto designs, the options are endless. Understanding the different types of styles and shapes can help you choose the perfect set for your look.
Choosing the right shape is essential. For instance, if you have a more active lifestyle, opting for a square shape might be more practical. On the other hand, if you’re going for elegance, almond or oval shapes can elevate your style.
2. Materials Used in Press On Nails
The materials used to make press on nails can vary significantly. Most common are acrylic and gel nails, each offering unique benefits. Acrylic nails are durable and less likely to break, making them ideal for everyday wear. Gel nails, however, provide a more natural look and feel, which many users prefer.
When selecting your press on nails, it's crucial to read the product description to understand the materials. This can help you avoid allergic reactions and ensure your nails last as long as possible.
Preparation: Getting Your Natural Nails Ready
3. Cleaning Your Natural Nails
Before applying press on nails, it's vital to prepare your natural nails properly. Start by removing any old nail polish and washing your hands thoroughly. This step not only cleans your nails but also removes any oils that could interfere with adhesion.
You might want to use a gentle nail file to buff the surface of your nails lightly. This creates a better surface for the press on nails to stick to, ensuring they last longer.
4. Cutting and Shaping Your Natural Nails
If your natural nails are long, consider trimming them down. Keeping your natural nails short helps the press on nails adhere better and reduces the risk of breaking them. Use a nail clipper to cut them and a file to shape them according to your preference.
Remember, the goal is to create a smooth base for your press on nails, so take your time with this step!
Application: The Best Techniques for Press On Nails
5. Choosing the Right Adhesive
Adhesive plays a crucial role in the longevity of your press on nails. There are various types available, including nail glue and adhesive tabs. If you’re looking for a temporary solution, adhesive tabs are your best bet. They’re easy to apply and remove but may not last as long as glue.
On the other hand, nail glue offers a stronger hold, perfect for longer wear. Just be cautious, as it can be challenging to remove.
6. Step-by-Step Application Process
Now that you’re prepared, it’s time to apply your press on nails! Here’s a step-by-step guide:
-
Select the Right Size: Each press on nail should fit snugly against your natural nail. If a nail is too big, you can file it down to fit.
-
Apply Adhesive: If you’re using glue, place a small amount on your natural nail and the press on nail. If using adhesive tabs, simply stick them to the back of the press on nail.
-
Press and Hold: Align the press on nail over your natural nail and press down firmly for about 10-15 seconds. This ensures a strong bond.
- Repeat: Continue this process for all your nails, taking care to keep them aligned and evenly spaced.
7. Finishing Touches
Once all your press on nails are applied, it’s time to add the finishing touches. Consider applying a top coat for added shine and protection. This step not only enhances the look of your nails but also helps them last longer.
Maintenance: Keeping Your Press On Nails Looking Fresh
8. Avoiding Common Mistakes
To ensure your press on nails last as long as possible, avoid common mistakes like using them as tools or exposing them to excessive water. Keeping your nails dry and avoiding harsh chemicals can significantly prolong their lifespan.
9. How to Remove Press On Nails Safely
When it’s time to remove your press on nails, do it gently. Soak your nails in warm, soapy water for about 10 minutes to loosen the adhesive. Then, gently lift the edges of the press on nails with a wooden stick or a similar tool. Avoid pulling them off forcefully, as this can damage your natural nails.
Conclusion
In conclusion, applying press on nails can be a quick and easy way to achieve a beautiful manicure without the hassle of a salon visit. By following the best practices outlined in this guide, you’ll know the best way to apply press on nails and keep them looking fabulous. Remember to choose the right style and material, prepare your nails properly, and apply them with care for the best results. Happy nail decorating!
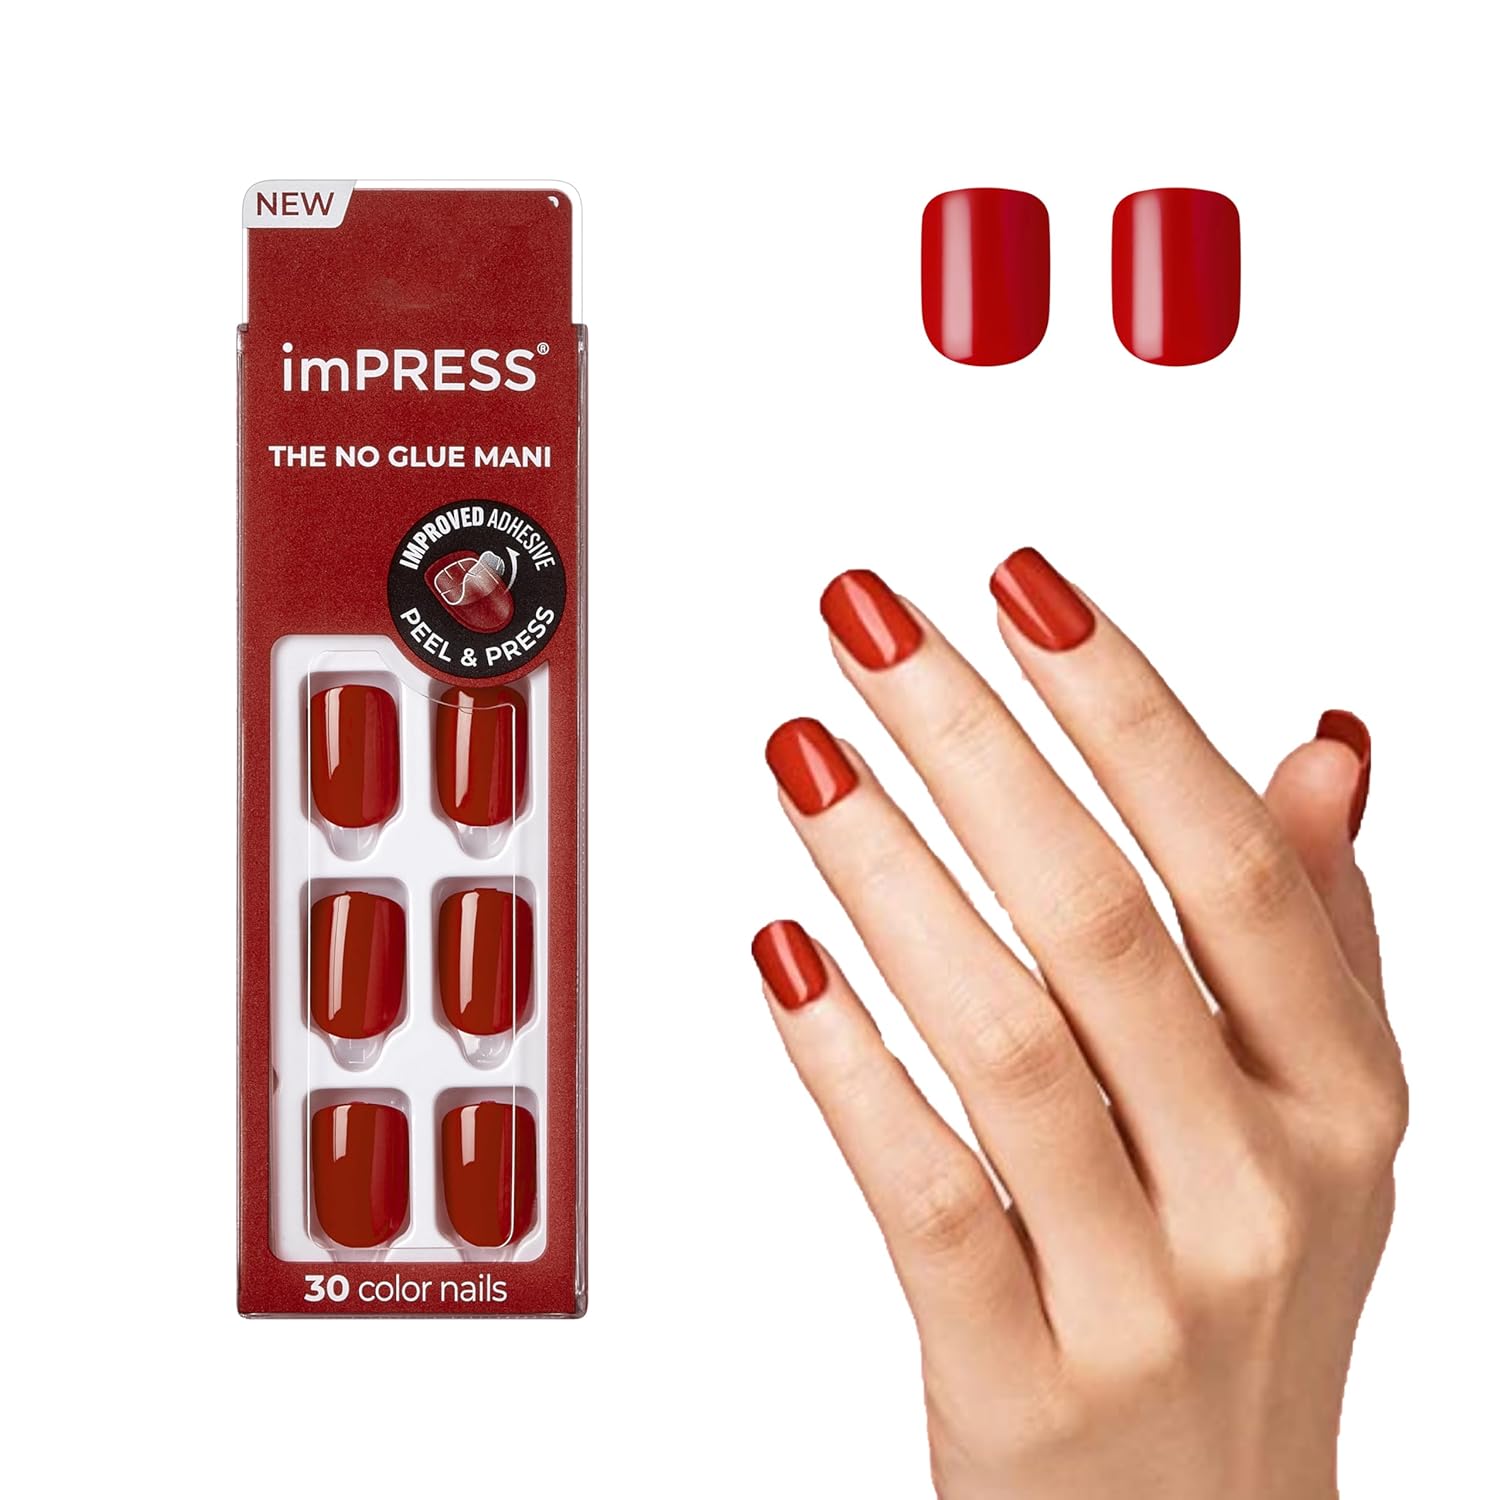
Why Polish When You Can imPRESS: Say goodbye to nail polish with NEW imPRESS Color Press-On Manicure; A polish-free mani in minutes; PureFit Technology makes them super slim & super comfortable; Available in 24 of the most irresistable shades
Solid Color Press-On Nails: With imPRESS comfort fit and Super Hold Adhesive, you'll easily achieve a salon looking gel nail polish manicure at home, in minutes; These fake nails come ready to wear, with no glue or nail polish required and no drying time
Long Lasting, Easy Application: Featuring Super Hold Adhesive for durable wear, these chip-proof, smudge-proof, waterproof nails are safe on natural nails and removal is hassle free; the perfect alternative to nail polish
DIY Nails That Wow: With press-on manicure kits, gel nails, matching manis & pedis, minis for kids and more, imPRESS has got you covered in the hottest solid nail polish colors, shapes, lengths, finishes, and custom accent designs
Every Mood, Every Moment: Since 2012, imPRESS Press-on Manicure, featuring patented SuperHold technology and an amazing gel finish, has revolutionized the beauty industry with a DIY manicure in minutes!