


Price: $8.99
(as of Apr 10, 2025 12:25:12 UTC - Details)
The Best Way to Apply Press-On Nails: A Comprehensive Guide
Introduction
Are you tired of spending hours at the nail salon, only to leave with a manicure that chips within days? Press-on nails might just be the solution you've been looking for! In this guide, we’ll explore the best way to apply press-on nails, a convenient option that offers both style and durability. Whether you're a nail art enthusiast or someone just wanting to add a little glam to your look, this article will provide you with practical tips and tricks. Let’s dive into the world of press-on nails and discover how to make them work for you!
Understanding Press-On Nails
What Are Press-On Nails?
Press-on nails are artificial nails that can be easily applied at home. They come in various shapes, sizes, and designs, making them a versatile choice for anyone looking to enhance their nails. Unlike traditional acrylics or gels, press-on nails require no drying time or extensive application process.
Benefits of Press-On Nails
One of the main advantages of press-on nails is their convenience. They can be applied quickly, often in just a few minutes, and removed without damaging your natural nails. Plus, they’re available in a wide range of styles, allowing you to switch up your look whenever you want.
Preparing for Application
Nail Prep: The Key to Success
Before you apply your press-on nails, proper preparation is essential. Start by cleaning your natural nails with soap and water to remove any oils or residue. Once dry, gently buff the surface of your nails to create a smooth base. This step is crucial as it helps the adhesive bond better.
Choosing the Right Size
Selecting the right size press-on nails is vital for a natural look. Most kits come with multiple sizes, so take your time to find the perfect fit for each finger. The right size will not only look great but also feel comfortable throughout the day.
The Application Process
How to Apply Press-On Nails: Step by Step
Now that your nails are prepped, let’s get into the application process. Follow these steps to ensure a flawless finish:
-
Select Your Adhesive: Some press-on nails come with adhesive tabs, while others require nail glue. Choose the one that suits your preference.
-
Apply the Adhesive: If using glue, place a small drop on your natural nail and spread it evenly. If using adhesive tabs, peel off the backing and apply them to your nail.
-
Press and Hold: Position the press-on nail over your natural nail and press down firmly for about 10-15 seconds. This will ensure a secure bond.
- Repeat for All Nails: Continue this process for all fingers, making sure to keep the nails aligned.
Finishing Touches
Once all your press-on nails are applied, take a moment to check for any gaps or uneven edges. If necessary, you can gently file the edges for a smoother look. Consider applying a top coat for extra shine and longevity.
Maintenance and Care
How to Care for Press-On Nails
To get the most out of your press-on nails, proper care is essential. Here are some tips to ensure they last longer:
-
Avoid Excessive Water: Prolonged exposure to water can weaken the adhesive. Wear gloves when washing dishes or taking a bath.
-
Limit Exposure to Chemicals: Try to avoid harsh chemicals that can damage the nails or the adhesive bond.
- Keep Them Clean: Gently clean your nails with a soft cloth to remove any build-up.
When to Remove Press-On Nails
Knowing when to remove your press-on nails is just as important as knowing how to apply them. If you notice any lifting or discomfort, it’s time to take them off. To remove, gently soak your nails in warm, soapy water for about 10 minutes. This will help loosen the adhesive, making removal easier.
Troubleshooting Common Issues
What to Do If Nails Don’t Stick
Sometimes, press-on nails may not adhere properly. This can be due to moisture or oils on your nails. If this happens, re-prep your nails by cleaning and buffing them again before reapplying.
Dealing with Lifting or Damage
If you notice your press-on nails starting to lift, don’t panic! You can easily fix this by applying a small amount of adhesive underneath the lifted area and pressing down again. However, if the nail is damaged or uncomfortable, it’s best to remove it.
Creative Ideas for Press-On Nails
Customizing Your Look
One of the best things about press-on nails is their versatility. You can easily customize them to reflect your personality. Consider adding nail art, stickers, or even painting over them with your favorite nail polish for a unique look.
Seasonal Styles and Trends
Keep an eye on seasonal trends to stay fashionable. For instance, bright colors and floral designs are popular in spring, while darker shades and glitter are great for winter. Experiment with different styles to keep your nails fresh and exciting.
Conclusion
In conclusion, the best way to apply press-on nails can transform your nail game effortlessly. With the right preparation, application, and care, you can enjoy beautiful nails that look salon-fresh without the time commitment. Remember to choose the right size, properly prep your nails, and maintain them well for the best results. Embrace the convenience and creativity that press-on nails offer, and you’ll never look back!
Now that you’re equipped with all the knowledge on how to apply press-on nails, it’s time to give them a try. Enjoy your new nail look and the compliments that come with it!
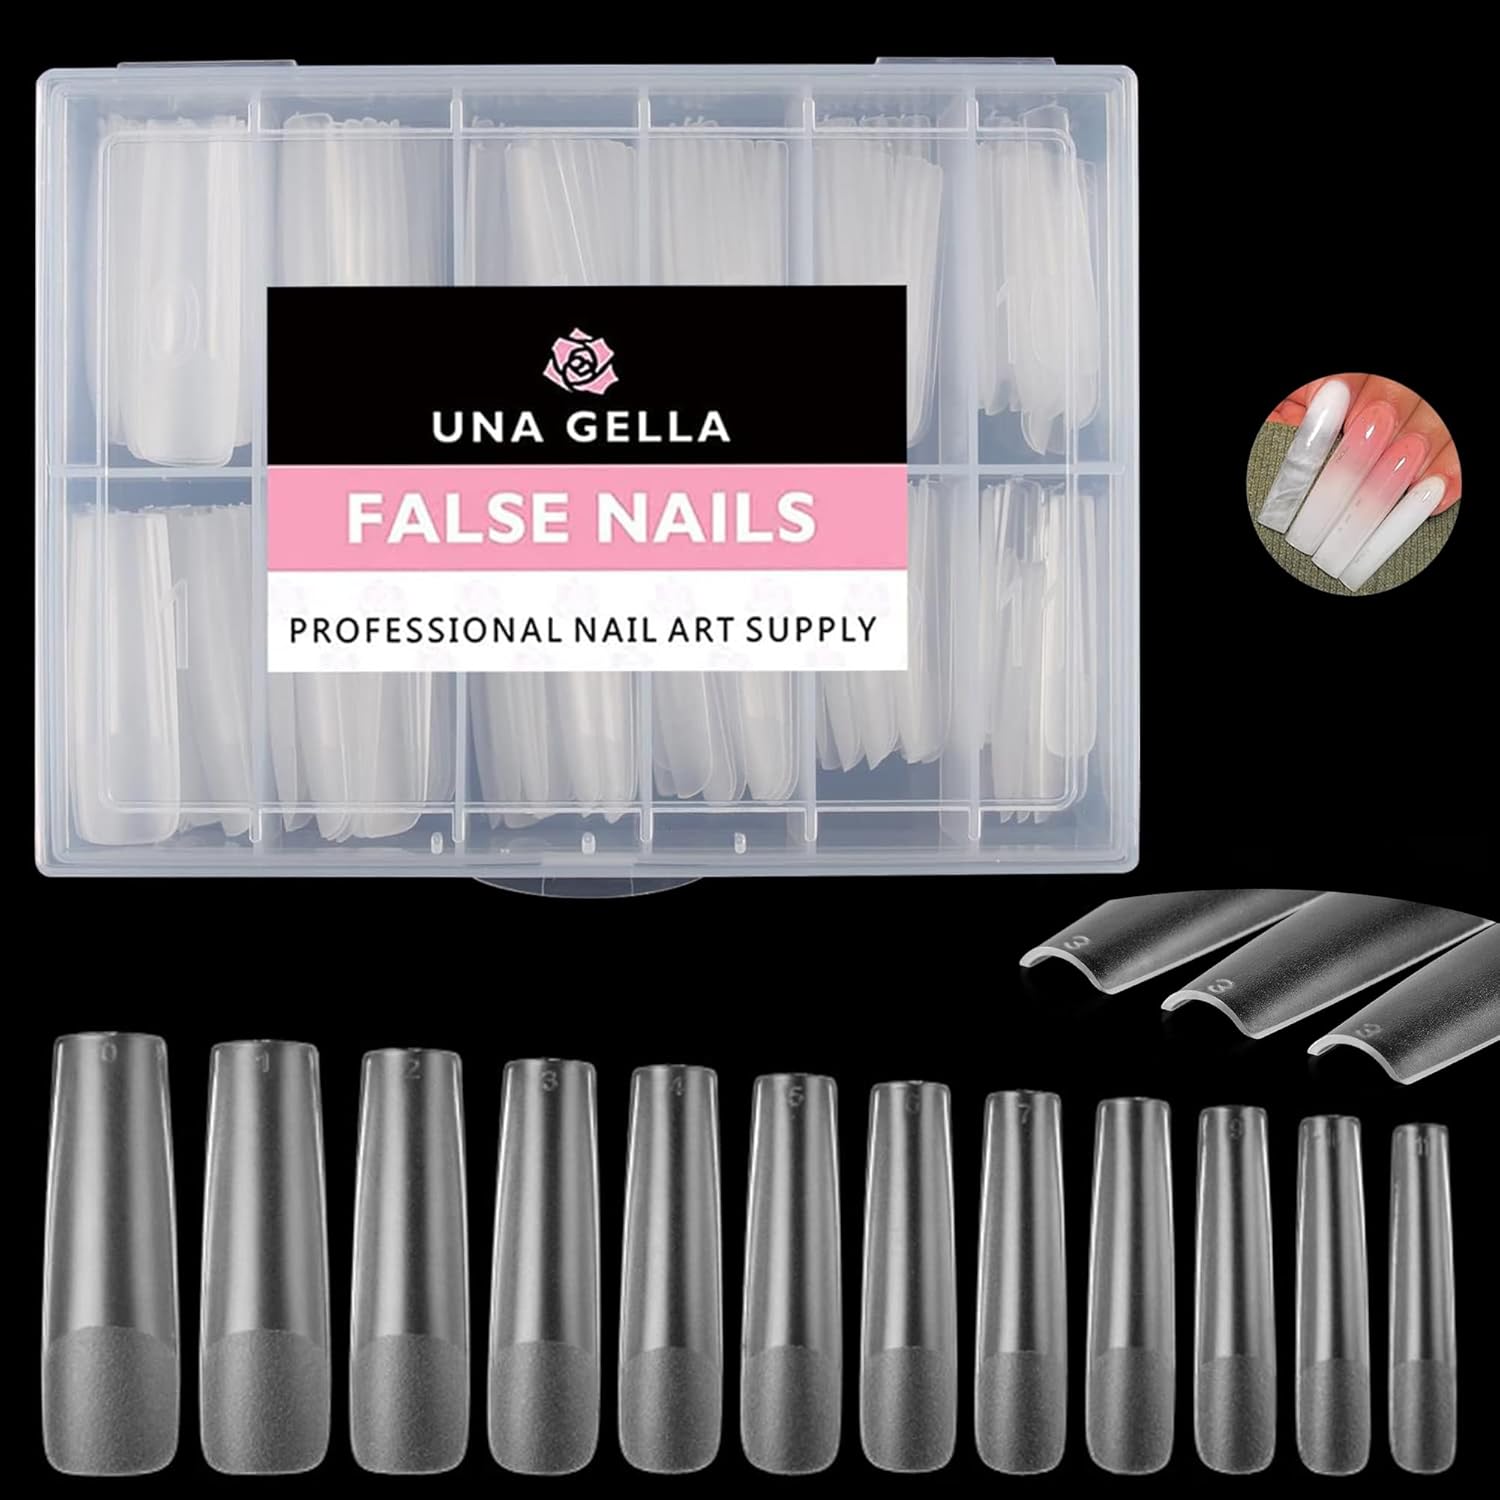
❤️Professional Long Square Shape Tips: Great extension Long Square fake tips show a great clear cover with premium innovate material soft gelly tips can be used with nail polish, dip powder, acrylic acrylic powder, easily make salon nail effect instead of dropping money at expensive salon!
❤️Long Square Tip with No Trace :The fake nails is gelly soft tips and will make no trace even bend, bright clear you can more easily press, trim, paint flat false nails to make your dream nails shape. Real DIY manicure gel tips.
Easy to Use: Our smooth edge of tips have a more shallow curve, convenient to press on nails beds tightly, without feeling uncomfortable "tightness", keep the color good without separation or exposure, your nails will look more naturally. Pre-shape tips no need file and saving much your time, more sturdy sticking.
❤️12 Sizes Tips Fit Your Nails: Our clear Long Square tips contain 12 sizes with size number on the top of the tips can easy pick proper tips for your nail. And 2 extra size can suit bigger or smaller
❤️Long Lasting 21 days+: The soft Long Squares tips can last more than 3 weeks according to the right using process, no smell and no harm to your nail. No crease Acrylic nail tips. Enjoy nail fun with your friend and family.